Dec 032015
 

SuperMicro server mainboards often include a dedicated Baseband Management Controller (BMC) which offers out-of-band management of the server system. This is a dedicated embedded chip (Specifications) which allow to power cycle the machine, monitor hardware variables, update firmware, access the operating system console and much more. If you are used to big brand server systems, then you might be more familiar with the term iLO, which is the HP Integrated Lights-Out, or IMM, which is the IBM Integrated Management Module. The basic functionality is always comparable.

FreeIPMI Management Utility

A nice fact is, that most of these out-of-band management solutions support the Intelligent Platform Management Interface (IPMI) specification, which defines an interface for accessing the various functionalities from an operating system (OS) or the network (e.g. for monitoring or OS recovery). For Linux there exists GNU FreeIPMI which is a collection of powerful tools for accessing IPMI-compatible BMCs. It is available via default package manager on all major Linux distributions.

Linux Kernel Configuration
As mentioned before, on Linux there are two different ways to access the BMC via IPMI. The first way is directly from the host running on the board connected to the BMC. The connection is done via kernel modules. Make sure you have at least the ipmi_defintf and ipmi_si modules loaded. If your kernel doesn’t include this modules, you might need to add them to your kernel configuration. The corresponding settings can be found under:

Device Drivers --->
   Character Devices --->
      <M> IPMI top-level message handler --->
          [ ]   Generate a panic event to all BMCs on a panic (NEW)
          <M>   Device interface for IPMI (NEW)
          <M>   IPMI System Interface handler (NEW)
          <M>   IPMI SMBus handler (SSIF) (NEW)
          <M>   IPMI Watchdog Timer (NEW)
          <M>   IPMI Poweroff (NEW)

You can check if it’s working by invoking ipmi-detect which should then output something like this:

# ipmi-locate
Probing KCS device using DMIDECODE... done
IPMI Version: 2.0
IPMI locate driver: DMIDECODE
IPMI interface: KCS
BMC driver device: 
BMC I/O base address: 0xCA2
Register spacing: 1

Probing SMIC device using DMIDECODE... FAILED

Probing BT device using DMIDECODE... FAILED

Probing SSIF device using DMIDECODE... FAILED

Probing KCS device using SMBIOS... done
IPMI Version: 2.0
IPMI locate driver: SMBIOS
IPMI interface: KCS
BMC driver device: 
BMC I/O base address: 0xCA2
Register spacing: 1

Probing SMIC device using SMBIOS... FAILED

Probing BT device using SMBIOS... FAILED

Probing SSIF device using SMBIOS... FAILED

[...]

There was an IPMI 2.0 compatible chip found, so we are good to go.

Network Configuration
The second way to connect via IPMI to the BMC is over the network. For this, there often is a dedicated network port on the mainboard that obviously needs to be connected to a network switch over which you can access it. By default the SuperMicro BMC is configured to get an IP address via DHCP. If the local IPMI connection is working, you can get the IP address by executing:

# ipmi-config --checkout --section Lan_Conf

#
# Section Lan_Conf Comments 
#
# In the Lan_Conf section, typical networking configuration is setup. Most users 
# will choose to set "Static" for the "IP_Address_Source" and set the 
# appropriate "IP_Address", "MAC_Address", "Subnet_Mask", etc. for the machine. 
#
Section Lan_Conf
        ## Possible values: Unspecified/Static/Use_DHCP/Use_BIOS/Use_Others
        IP_Address_Source                             Use_DHCP
        ## Give valid IP address
        IP_Address                                    192.168.1.15
        ## Give valid MAC address
        MAC_Address                                   0C:C4:7A:73:18:4F
        ## Give valid Subnet Mask
        Subnet_Mask                                   255.255.255.0
        ## Give valid IP address
        Default_Gateway_IP_Address                    192.168.1.1
        ## Give valid MAC address
        Default_Gateway_MAC_Address                   00:0D:B9:22:15:A2
        ## Give valid IP address
        Backup_Gateway_IP_Address                     0.0.0.0
        ## Give valid MAC address
        Backup_Gateway_MAC_Address                    00:00:00:00:00:00
EndSection

Otherwise you might need to search the DHCP server log for an entry, which IP address was given to the BMC. I recommend to set the BMC IP address to a fixed value, to minimize the risk to loose connectivity in case of major data center issue. This can be done via Web interface at e.g. https://192.168.1.15 or via ipmi-config:

# ipmi-config --commit -e Lan_Conf:IP_Address_Source=Static
# ipmi-config --commit -e Lan_Conf:IP_Address=192.168.1.42

Alternatively you can write the configuration in file and commit it with the --filename argument. E.g. create a static-network.conf:

# Static network configuration for the BMC
Section Lan_Conf
        IP_Address_Source                             Static
        IP_Address                                    192.168.1.42
EndSection

Unfortunately the IP_Address_Source key cannot be changed concurrently with other Lan_Conf keys. So we had to run the commit command twice, when specifying the new values on the command line and the same is true with the configuration file option. The first time it will set the IP_Address_Source:

# ipmi-config --commit --filename=static-network.conf

And the second time, it will set the new IP_address:

# ipmi-config --commit --filename=static-network.conf

However, this is an exception and most other key/value pairs can be changed concurrently. See the ipmi-config(8) man-page for more details.

Eventually we can check if the IPMI interface is reachable via network. This can be done with the ipmi-ping tool. If the --verbose argument is added, it will even output some information about the configured authentication settings. E.g.:

# ipmi-ping --count 1 --verbose 192.168.1.42
ipmi-ping 192.168.1.42 (192.168.1.42)
response received from 192.168.1.42: rq_seq=23, auth: none=clear md2=set md5=set password=set oem=clear anon=clear null=clear non-null=set user=clear permsg=clear 
--- ipmi-ping 192.168.1.42 statistics ---
1 requests transmitted, 1 responses received in time, 0.0% packet loss
Configure Serial-over-LAN (SoL) Console Access

A neat feature of a BMC is the ability to remotely access the Linux console even when the regular network connection to the server is not working any more. However, this needs some additional configuration in the operating system.

Check SoL Settings in BIOS
First, we will check the BIOS settings to make sure the SoL feature is enabled. Note that accessing the BIOS usually already works in the default configuration, so if you are adventurous, you can already connect over remote IPMI (for demonstration purpose I’ll use the default user ADMIN):

$ ipmi-console -h 192.168.1.42 -u ADMIN -P

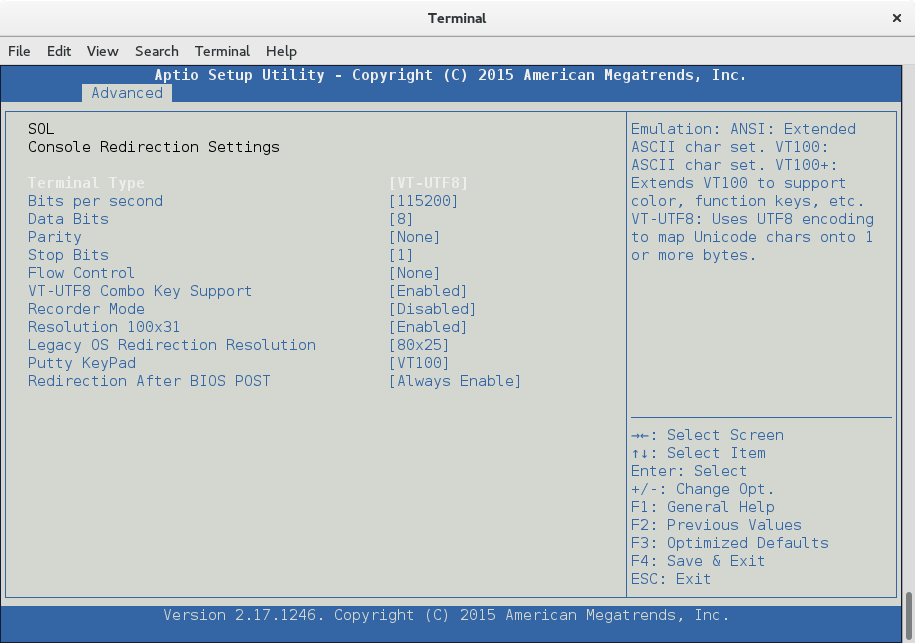
By default you won’t have access to the Linux system yet, so reboot the system via SSH so the BIOS can be setup accordingly. Unfortunately, the IPMI console won’t show the system’s POST output, so you have to keep pressing the DEL button in the terminal with the open IPMI console until you see the BIOS main screen. Then go to Advanced -> Serial Port Console Redirection and make sure, the SOL Console Redirection is enabled. Also remember how many additional serial ports you have available for configuration in this menu. This will become important when selecting the correct console in the Linux configuration. E.g. my board only has one other serial port (COM1) available and for this one console redirection one mustn’t be enabled for SoL to work correctly.

SuperMicro BIOS settings accessed via ipmi-console

SuperMicro BIOS settings accessed via ipmi-console

If you want to see more verbose POST output, also disable Quiet Boot in the Advanced -> Boot Feature menu.

Leave the BIOS by pressing Save Changes and Reset. After a short while you should be greeted by the Grub menu. However, there won’t be any more output, as Linux doesn’t know yet, where to connect to the SoL console. To exit the IPMI console, you have to press &..

Setup Serial Console in Linux
If you have a systemd-based distribution all you need to do is to modify the kernel command line and add a serial console. Edit /etc/default/grub and extend the GRUB_CMDLINE_LINUX variable as following:

GRUB_CMDLINE_LINUX="rd.lvm.lv=vg00/swap rd.lvm.lv=vg00/slash rhgb quiet console=tty0 console=ttyS1,115200n8"

Important: This has to be /dev/ttyS1 in case the BIOS knows only knows one additional serial port (which would correspond to /dev/ttyS0). If you have two additional serial ports in the BIOS (COM1/COM2), you must set /dev/ttyS2 here. Don’t configure Grub 2 to output itself to the serial console, as this is still handled by the default SoL configuration forwarding the initial system output.

Regenerate the grub.cfg with:

# grub2-mkconfig -o /boot/grub2/grub.cfg

You might need to adjust the command and grub.cfg path according to your installation. The next time when the system is booted, the Linux system output will be available on the serial terminal and there will also be a login prompt. If you don’t have a systemd-based system, you additionally need to enable the serial console login terminal in the /etc/inittab. E.g.:

T1:23:respawn:/sbin/getty -L ttyS1 115200 vt100
Remotely Manage the System over IPMI

Now everything we need is in place. We can independently from the Linux operating system or the local system console:

  1. Configure the BMC via ipmi-config (see above)
  2. Access the Linux console via ipmi-console
  3. Query system sensor values (temperatures, voltages, …) via ipmi-sensors
  4. Query system event log via ipmi-sel
  5. Initiate system startup and power reset via ipmi-power

Even tough I have the latest available IPMI firmware installed, it sometimes happened to me, that the SoL wouldn’t properly connect to the Linux console any more after I disconnected when being in the BIOS. Or that I could navigate through the BIOS but it wouldn’t refresh the screen. Unfortunately the only way that I found to fix this, was to reboot the BMC. Of course also this is possible over IPMI:

$ bmc-device -h 192.168.1.42 -u ADMIN -P --cold-reset

There are many other things that you can do via IPMI. Also there are other tools which can access IPMI-enabled BMCs. Another famous one is ipmitool. You might want to checkout Adam Sweet’s wiki on IPMI on Linux for more details how to use ipmitool. Personally, I prefer FreeIPMI for being a GNU project, being very intuitive to use and so far it worked perfectly well for everything I needed.

If you have some hints or additions, please leave a comment below. Thanks for reading.
Dec 012015
 

I recently had the challenge to migrate a physical host running Debian, installed on a ancient 32bit machine with a software RAID 1, to a virtual machine (VM). The migration should be as simple as possible so I decided to attach the original disks to the virtualization host and define a new VM which would boot from these disks. This doesn’t sound too complicated but it still included some steps which I was not so familiar with, so I write them down here for later reference. As an experiment I tried the migration on a KVM and a Xen host.

Prepare original host for virtualized environment

Enable virtualized disk drivers
The host I wanted to migrate was running a Debian Jessie i686 installation on bare metal hardware. For booting it uses an initramfs which loads the required disk controller drivers. By default the initramfs only includes the drivers for the current hardware, so the paravirtualization drivers for KVM (virtio-blk) or Xen (xen-blkfront) are missing. This can be changed by adjusting the /etc/initramfs-tools/conf.d/driver-policy file to state that not the currently dependent (dep) modules should be loaded, but most:

# Driver inclusion policy selected during installation
# Note: this setting overrides the value set in the file
# /etc/initramfs-tools/initramfs.conf
MODULES=most

Afterwards the initramfs must be rebuilt by running the following command (adjust the kernel version according to the kernel you are running):

# dpkg-reconfigure linux-image-3.16.0-4-686-pae

Now the initramfs contains all required modules to successfully boot the host from a KVM virtio or a Xen blockfront disk device. This can be checked with:

# lsinitramfs /boot/initrd.img-3.16.0-4-686-pae | egrep -i "(xen|virtio).*blk.*\.ko"
lib/modules/3.16.0-4-686-pae/kernel/drivers/block/virtio_blk.ko
lib/modules/3.16.0-4-686-pae/kernel/drivers/block/xen-blkback/xen-blkback.ko
lib/modules/3.16.0-4-686-pae/kernel/drivers/block/xen-blkfront.ko

Enable serial console
To easily access the server console from the virtualization host, it’s required to setup a serial console in the guest, which must be defined in /etc/default/grub:

[...]
GRUB_CMDLINE_LINUX="console=tty0 console=ttyS0,115200n8"
GRUB_SERIAL_COMMAND="serial --unit=0 --speed=115200 --word=8 --parity=no --stop=1"
[...]
# Uncomment to disable graphical terminal (grub-pc only)
GRUB_TERMINAL="console serial"

After regenerating the Grub configuration, the boot loader and local console will then also be accessible via virsh console:

# grub-mkconfig -o /boot/grub/grub.cfg
Run the host on a KVM hypervisor

KVM is nowadays the de-facto default virtualization solution for running Linux on Linux and is very well integrated in all major distributions and a wide range of management tools. Therefore it’s really simple to boot the disks into a KVM VM:

  • Make sure the disks are not already assembled as md-device on the KVM host. I did this by uninstalling the mdadm utility.
  • Run the following virt-install command to define and start the VM:
    # virt-install --connect qemu:///system --name myhost --memory 1024 --vcpus 2 --cpu host --os-variant debian7 --arch i686 --import --disk /dev/disk/by-id/ata-WDC_WD10EFRX-68PJCN0_WD-WCC4J4527214 --disk /dev/disk/by-id/ata-WDC_WD10EFRX-68PJCN0_WD-WCC4J4366412 --network bridge=virbr0 --graphics=none

To avoid confusion with the disk enumeration of the KVM host kernel, the disk devices are given as unique device paths instead of e.g. /dev/sdb and /dev/sdc. This clearly identifies the two disk devices which will then be assembled to a RAID 1 by the guest kernel.

Run the host on a Xen hypervisor

Xen has been a topic in this blog a few times before as I’m still using it since its early days. After a long time of major code refactorings it also made huge steps forward within the last few years, so that nowadays it’s nearly as easy to setup as KVM and again well supported in the large distributions. Because its architecture is a bit different and Linux is not the only supported platform some things work not quite the same as under KVM. Let’s find out…

Prepare Xen Grub bootloader
Xen virtual machines can be booted in various different ways, also depending whether the guest disk is running on an emulated disk controller or as paravirtualized disk. In simple cases, this is done with help of PyGrub loading a Grub Legacy grub.conf or a Grub 2 grub.cfg from a guests /boot partition. As my grub.cfg and kernel is “hidden” in a RAID 1 a fully featured Grub 2 is required. It is perfectly able to load its configuration from advanced disk setups such as RAID arrays, LVM volumes and more. With Xen such a setup is only possible when using a dedicated boot loader disk image which must be in the target architecture of the virtual machine. As I want to run a 32bit virtual machine, a i386-xen Grub 2 flavor needs to be compiled as basis for the boot loader image:

  • Clone the Grub 2 source code:
    $ git clone git://git.savannah.gnu.org/grub.git
  • Configure and build the source code. I was running the following commands on a Gentoo Xen server without issues. On other distributions you might need to install some development packages first:
    $ cd grub
    $ ./autogen.sh
    $ ./configure --target=i386 --with-platform=xen
    $ make -j3
  • Prepare a grub.cfg for the Grub image. The Grub 2 from the Debian guest host was installed on a mirrored boot disk called /dev/md0 which was mounted to /boot. Therefore the Grub image must be hinted to load the actual configuration from there:
    # grub.cfg for Xen Grub image grub-md0-i386-xen.img
    normal (md/0)/grub/grub.cfg
  • Create the Grub image using the previously compiled Grub modules:
    # grub-mkimage -O i386-xen -c grub.cfg -o /var/lib/libvirt/images/grub-md0-i386-xen.img -d ~user/grub/grub-core ~user/grub/grub-core/*.mod

A more generic guide about generating Xen Grub images can be found at Using Grub 2 as a bootloader for Xen PV guests.

Define the virtual machine
virt-install can also be used to import disk (images) as Xen virtual machines. This works perfectly fine for e.g. importing Atomic Host raw images, but unfortunately the setup now is a bit more complicated. It requires me to specify the custom Grub 2 image as guest kernel for which I couldn’t find a corresponding virt-install argument (using v1.3.0). Therefore I first created a plain Xen xl configuration file and then converted it to a libvirt XML file. The initial configuration /etc/xen/myhost.cfg looks as following:

name = "myhost"
kernel = "/var/lib/libvirt/images/grub-md0-i386-xen.img"
memory = 1024
vcpus = 2
vif = [ 'bridge=virbr0' ]
disk = [ '/dev/disk/by-id/ata-WDC_WD10EFRX-68PJCN0_WD-WCC4J4527214,raw,xvda,rw', '/dev/disk/by-id/ata-WDC_WD10EFRX-68PJCN0_WD-WCC4J4366412,raw,xvdb,rw' ]

Eventually this configuration can be converted to a libvirt domain XML with the following command:

# virsh domxml-from-native --format xen-xl --config /etc/xen/myhost.cfg > /etc/libvirt/libxl/myhost.xml
# virsh --connect xen:/// define /etc/libvirt/libxl/myhost.xml
Summary

At the end, I successfully converted the bare metal host to a KVM and/or Xen virtual machine. Once again Xen ended up being a bit more troublesome, but no nasty hacks were required and both configurations were quite straight forward. The boot loader setup for Xen could definitely be a bit simpler, but still it’s nice to see how well Grub 2 and Xen play together now. It’s also pleasing to see, that no virtualization specific configurations had to be made within the guest installation. The fact that the disk device names were changing from /dev/sd[ab] (bare metal) to /dev/vd[ab] (KVM) and /dev/xvd[ab] (Xen) was completely absorbed by the mdadm layer, but even without software RAID the /etc/fstab entries are nowadays generated by the installers in a way, that such migrations are easy possible.

Thanks for reading. If you have some comments, don’t hesitate to write a note below.

May 162014
 

I recently bought a PC Engines APU1C4 x86 embedded board which is meant to be the board for my future custom NAS box. In comparison to the various ARM boards it promises to be powerful and I/O friendly (3x Gbit LAN, SATA, 3x mini PCIe) and doesn’t include redundant graphics and sound circuits. On the other hand the only way to locally access it is via a serial terminal. Before installing the final system, hopefully more about this in a later article, I wanted to have a quick glance at the system from a Linux point of view. I tried booting the device over an USB stick prepared with my favorite live system SystemRescueCD, which by the way is based on Gentoo, but somehow failed as the boot process didn’t support output on a serial device and never spawned a terminal on it either. Before loosing too much time in searching for another media which would support a serial console, I simply setup my own minimal boot system based on Fedora 19. Here will follow a quick summary on what was required to achive this, as I couldn’t find a good and recent how-to about such a setup either. Because this minimal system is meant for ad-hoc booting only, I will keep things as simple as possible.

Prepare the installation medium

The APU1C4 supports booting over all possible storage devices, so you need to have a spare USB stick, external USB disk, mSATA disk, SATA disk or a SD card for storing the minimal Linux installation. Create at least one partition with a Linux file system of your choice on it and mount it. This will be the root directory of the new system. The following example will show how the setup is done on a device /dev/sdb with one partition mounted to /mnt/usbdisk:

host # mount /dev/sdb1 /mnt/usbdisk

Bootstrap minimal Fedora system in alternative root directory

Redhat-based distributions have an easy way to install a new system to an alternative root directory. Namely, it can be done with the main package manager yum. To keep it easy I used a Fedora 19 host system to setup the boot disk. While being in the context of the host system (below indicated with ‘host #‘), always be careful that your commands are actually modifying the content under /mnt/usbdisk. Otherwise you might have a bad surprise when you reboot your host system the next time.

1. Prepare RPM database:

host # mkdir -p /mnt/usbdisk/var/lib/rpm
host # rpm --root /mnt/usbdisk/var/lib/rpm --initdb

2. Install Fedora release package:

host # yumdownloader --destdir=/tmp fedora-release
host # rpm --root /mnt/usbdisk -ivh /tmp/fedora-release*rpm

3. Install a minimal set of packages (add whatever packages you’d like to have in the minimal system):

host # yum --installroot=/mnt/usbdisk install e2fsprogs kernel \
rpm yum grub2 openssh-client openssh-server passwd less rootfiles \
vim-minimal dhclient pciutils ethtool dmidecode

4. Copy DNS resolver configuration:

host # cp -p /etc/resolv.conf /mnt/usbdisk/etc

5. Mount pseudo file systems for chroot:

host # mount -t proc none /mnt/usbdisk/proc
host # mount -t sysfs none /mnt/usbdisk/sys
host # mount -o bind /dev /mnt/usbdisk/dev

5. chroot into the new system tree to finalize the installation:

host # chroot /mnt/usbdisk /bin/bash

6. Set root password

chroot # passwd

7. Prepare system configurations:

chroot # echo "NETWORKING=yes" > /etc/sysconfig/network

8. If you only have one partition with the entire system, a fstab is not needed anymore as dracut and Systemd will already know how to mount it. Otherwise create the fstab (use the UUID if you’re not sure how the disk will be called on the target system):

chroot # dumpe2fs -h /dev/sdb1 | grep UUID
dumpe2fs 1.42.7 (21-Jan-2013)
Filesystem UUID: bfb2fba1-774d-4cfc-a978-5f98701fe58a
chroot # cat << EOF >> /etc/fstab
UUID=bfb2fba1-774d-4cfc-a978-5f98701fe58a / ext4 defaults 0 1
EOF

9. Setup Grub 2 for serial console:

chroot # cat << EOF >> /etc/default/grub
GRUB_DEFAULT=0
GRUB_TIMEOUT=5
GRUB_DISTRIBUTOR="Fedora"
GRUB_CMDLINE_LINUX_DEFAULT=""
GRUB_CMDLINE_LINUX="console=ttyS0,115200n8 rd.lvm=0 rd.md=0 rd.dm=0 rd.luks=0 LANG=en_US.UTF-8 KEYTABLE=us"
GRUB_TERMINAL="serial"
GRUB_SERIAL_COMMAND="serial --unit=0 --speed=115200 --word=8 --parity=no --stop=1"
GRUB_DISABLE_OS_PROBER=true
EOF
chroot # grub2-install /dev/sdb
chroot # grub2-mkconfig -o /boot/grub2/grub.cfg

10. We’re done. Exit the chroot and unmount it:

chroot # exit
host # umount /mnt/usbdisk/dev
host # umount /mnt/usbdisk/proc
host # umount /mnt/usbdisk/sys
host # umount /mnt/usbdisk

Now you can remove the disk from the host and connect it with the embedded board you want to boot.

Connect to the serial console and start the system

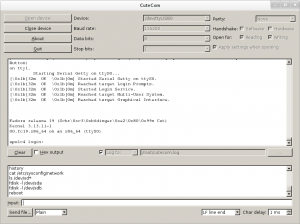
For connecting to the embedded board a USB to serial adapter and a null modem cable is required. There exist a number of tools to connect to a serial console on Linux which you probably already know (e.g. screen or minicom). However, I always found them painful to use. The tool of my choice is called CuteCom and is a graphical serial terminal. After selecting the correct serial device (/dev/ttyUSB0 in my case) and baud rate, you can power on your device and you’ll hopefully be greeted by the boot messages of your board and the freshly installed Linux system:

CuteCom

If there is no output in the terminal make sure, you use null-modem cable or adapter and not a simple serial extension cable. Further check for the correct serial port device in your serial terminal configuration and play around with the baud rate.

Good luck and have fun with your embedded device. 🙂